FireMonkey Visual Plugins (Delphi)
FireMonkey is a new cross-platform GPU-powered GUI framework for Delphi. It is not an evolution of the VCL, nor does it replace it.
Hydra support for FireMonkey plugins and hosts that allows you to easily mix VCL, WinForms, WPF, Silverlight and FireMonkey in your applications.
In this article I will describe how to create a new FireMonkey visual plugin and talk about what features it provides and how they can be used.
Getting Started
Before we start to create our first plugin, let's look at a whole Hydra plugin project.
A Hydra plugin project consists of three parts:
- Plugin Module - A DLL project that acts as a container for the module controller and can hold a set of plugins.
- Module Controller - The entry point of the module. The module controller supplies the host with information about stored plugins and provides methods that allow the host to instantiate and work with plugins.
- Plugins - Special classes stored inside the plugin module.
Now we can describe how to create and setup a Hydra plugin project and add a visual FireMonkey plugin to it.
Working with Wizards
Creating a Hydra plugin is a very simple process which is entirely automated by our IDE wizards.
The following screenshots will show you all the steps required to create a new Hydra Module and add a visual plugin to it.
Creating a new Plugin Module
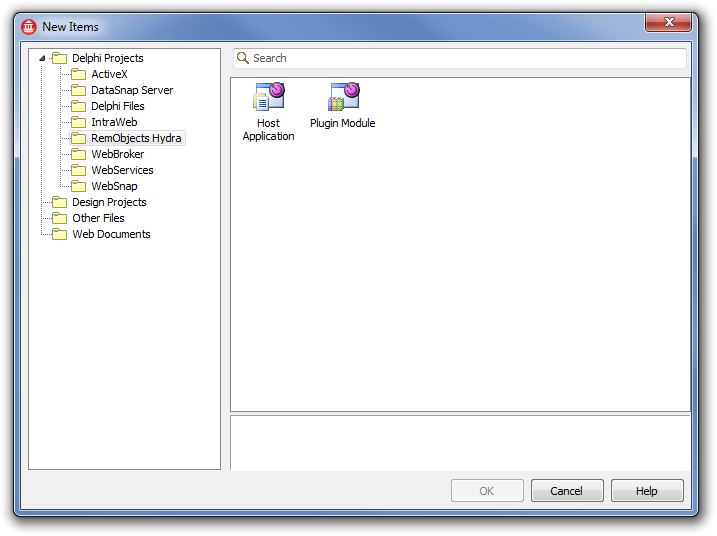
In the IDE File -> New -> Other go to the RemObjects Hydra category and select the Plugin Module option:
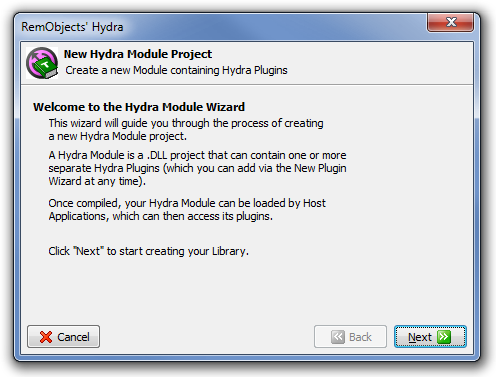
The New Hydra Module Project wizard will start and you will be presented with a Welcome screen.
On the next page, the wizard allows you to select a folder where the project will be saved, the name of the project and its type:
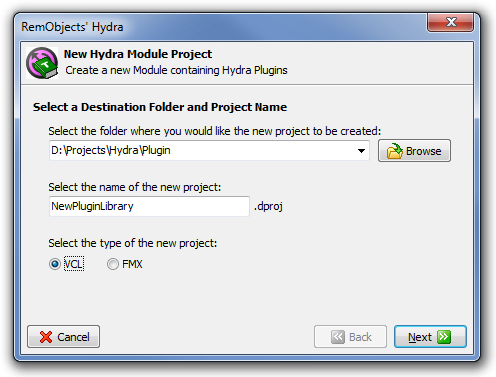
As you can see, you can choose between FireMonkey and VCL; to create a FireMonkey plugin module you will need to select that option.
The next step is to configure a module controller for the project:
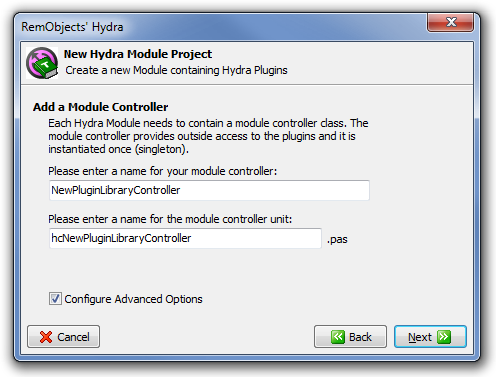
You can choose a name for the controller and (by checking the Configure Advanced Options) set up its data.
The following screenshots show pages with additional options for the module controller:
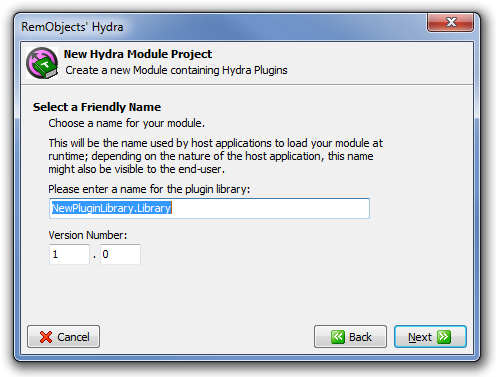
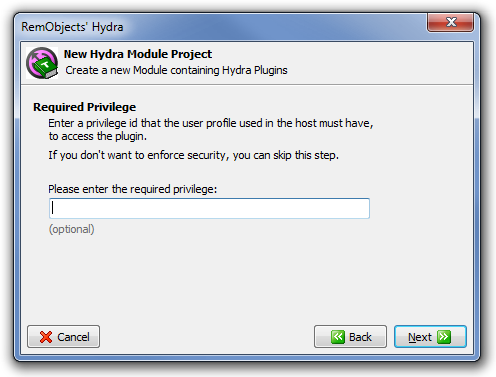
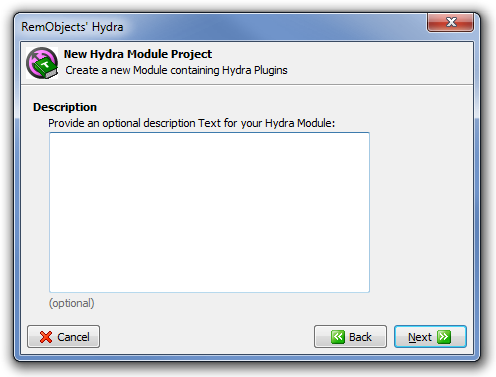
These pages allow you to set module controller data, like name or description. All this data is optional and can be changed later in the project.
Now the final screen that will summarize the project options:
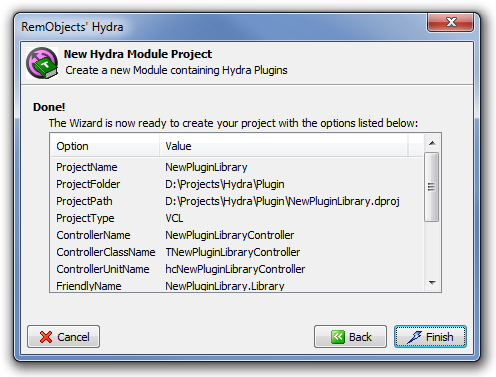
If everything is fine, press the Finish button and the wizard will create a new Hydra plugin module and add a new module manager to it.
Creating a new Plugin
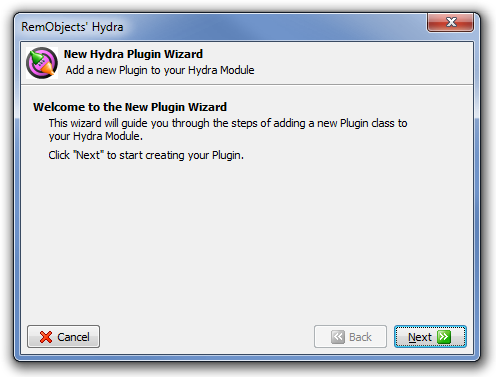
After the new plugin module is created, it will automatically start the New Hydra Plugin wizard that allows you to create a new plugin. You can launch this wizard anytime from the IDE menu File -> New -> Other by selecting the RemObjects Hydra category and the Hydra Plugin item.
On the next page, you can select the type of the plugin:
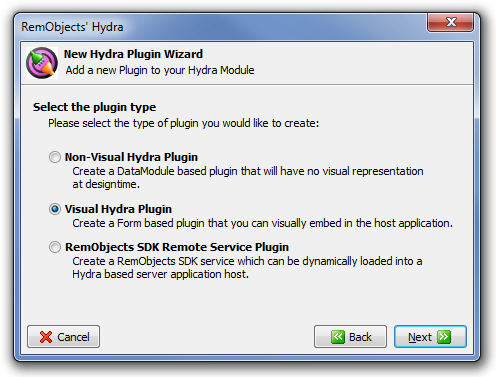
The wizard allows you to create three different types of plugin. For this article, we will use the Visual Hydra Plugin option.
After selecting the plugin type, you need to specify a plugin name:
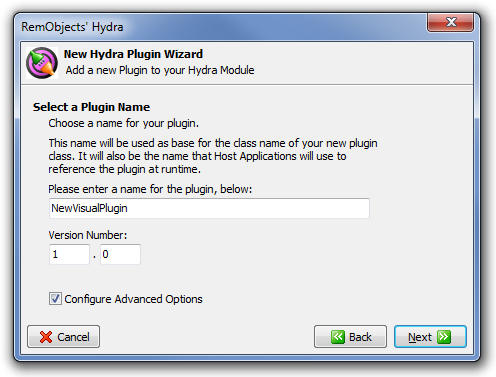
You can also set the plugin version as well as additional options by checking the Configure Advanced Options. The advanced options pages are exactly the same as in the New Hydra Module wizard. They are optional and can be edited at any time in the project.
After everything is set, the wizard will show a summary page:
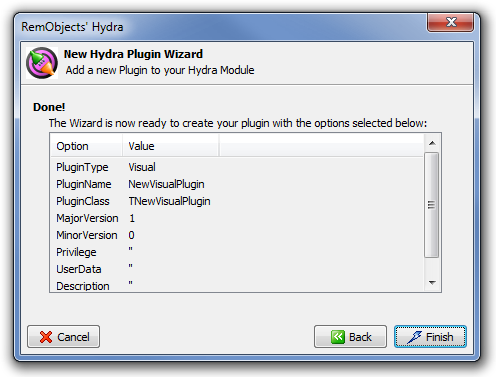
It will then add a new file that contains the visual plugin and show a dialog that allows you to choose runtime package settings:
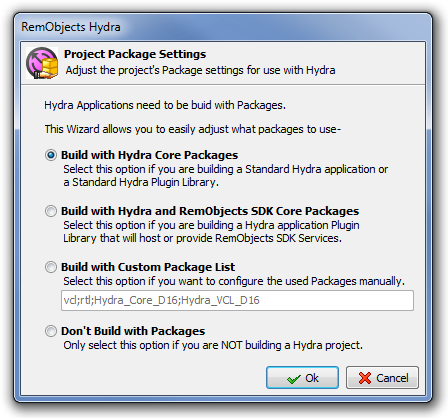
I will describe how to work with runtime packages later in this article.
Review the resulting project
Let's review the resulting project:
- Project file - The wizard will create a *.dpr file and, if needed, additional project files (like *.dproj). The only line Hydra added to the project file is: {#HYDRAMODULE}. Please do not remove this line, it allows our IDE tools to recognize the Hydra module file.
- Module Controller file - This file contains the definition of the module controller and the entry point:
resourcestring
  sDescription = '';

const
  sRequiredPrivilege = '';

procedure HYFMGetModuleController(out anInstance: IHYCrossPlatformModule); stdcall;
begin
  if not Assigned(NewPluginLibraryController) then
    NewPluginLibraryController := TNewPluginLibraryController.Create('NewPluginLibrary.Library', 1, 0,
sRequiredPrivilege, sDescription);
  anInstance := NewPluginLibraryController;
end;

exports
  HYFMGetModuleController name name_HYFMGetModuleController;

initialization
finalization
  if Assigned(NewPluginLibraryController) then
    FreeAndNil(NewPluginLibraryController);
@@@As you can see, there is a method (HYFMGetModuleController) that acts as entry point for the module. It returns a interface that can be used by a Hydra host applications to get a reference to the module controller.@@@
Please note how we created an instance of the module controller. As you can see, it uses data that we defined with the wizard, but you can change this data manually.
- Visual plugin file - Contains the wizard-generated definition of the visual plugin:
procedure Create_NewVisualPlugin(out anInstance: IInterface);
begin
  anInstance := TNewVisualPlugin.Create(NIL);
end;

resourcestring
  sDescription = '';

const
  sRequiredPrivilege = '';
  sUserData = '';

initialization
  RegisterPlugin('NewVisualPlugin', Create_NewVisualPlugin, TNewVisualPlugin,
                          1, 0, sRequiredPrivilege, sDescription, sUserData);
@@@First thing is the method that creates a new instance of the plugin.@@@ This method will be called by the module controller when the host application asks for a plugin instance. As you can see, by default it creates a new instance on every call.
The initialization section calls the RegisterPlugins method that registers our plugin in the module controller, like the code in the controller uses data that was entered via the wizard to initialize plugin descriptor.
Using the plugin
By now you will have a complete project that, without any additional work, can be loaded by all supported host platforms.
Both module controller and visual plugin provide a set of internal methods that are used by the Hydra framework to perform specific tasks, however, they also provide some useful methods/properties which can be used in your own application.
Below we will describe the most common way to use the module controller and plugin, but first, let's talk about custom interfaces. One of the major parts of the Hydra framework are custom interfaces. Custom interfaces are user-defined interfaces that can be used in the cross-platform environment (they can, for example, be shared between a FireMonkey host and a .NET plugin) to receive access to data or to call host or plugin methods. When we talk about things like "accessing host methods" we refer to the custom interfaces, but since this is a large topic, we can't cover it in this article, so if you feel like you need to use them, please take a look at these two articles:
- Interface-based Communication - General information about custom interfaces
- Passing Interfaces between Host and Plugins - Describes how to write and use custom interfaces
Before we start to describe the visual plugin itself, let's look at how you can use the module controller.
How to use Module Controller
While the main purpose of the module controller is to provide information about plugins to the host, it can also be useful with some specific tasks.
The host will instantiate the module controller only once on module load, so it can be used to initialize some global data or allow the host to gain access to global methods via custom interfaces.
By default the module controller holds two ImageList controls, assigned to the
SmallImages and LargeImages properties. These image lists will be
passed to the host application, so you can use them to store shared
images.
ModuleController also has an event called HostChanged. This is an important event if you
need to be able to access host methods or data. Since the controller is
initialized on module load, it doesn't have access to the Host property
at the time when its constructor is executed. When the host assigns its
reference to the module controller, the HostChanged event is fired and
you can safely get access to the host. One thing that you need to
consider is that this event can be called with a null host reference (when the host
unloads a module) so you need to check this before accessing host
members.
The last thing that is available to the module controller is the Host property; this property holds the reference to the host object, and can be used to access host methods or data.
How to use the Visual Plugin
The visual plugin is a descendant of FMX.Forms.TForm that has an internal set of methods
that allows it to be embedded into any supported host application.
The visual plugin represents a common 2D form, Hydra doesn't provide a
predefined template for 3D forms, however, you can use the TViewport3D component to
enable exactly the same functionality as the FireMonkey 3D form provides.
You can use the visual plugin like any regular FireMonkey forms, since it provides exactly the same design surface and functionality like regular forms do, however, there are some limitations:
- When the plugin is shown in the host application, Hydra will remove the caption and border from it.
- You can't change the Position and WindowState properties, since the plugin will be embedded into the host control.
- The Visible property has no effect if you set it in design time.
- Unlike regular forms, plugin lifetime is controlled by the host application, so the instance of the plugin will be destroyed when the host releases its reference.
Like the module controller, the visual plugin provides the OnSetHost and Host members that are described above.
Runtime Packages
Hydra provides an easy way to enable runtime packages support for your project by using the Project Package Settings dialog, as described here.