Building 64-Bit Applications
Starting from XE2, Delphi brings support for x64 bit applications. Following this improvement, Hydra 4 also provides the ability to create and use x64 hosts and plugins.
In this topic we will look at how to create an application that is able to work in the x64 environment.
Hydra for Delphi
Hydra 4 comes with pre-compiled x64 binaries, but requires some additional steps to be able to compile your application with x64 bit support.
Our installer automatically install binaries and adds everything into the Delphi path, the only thing you need to do is to activate the platform. In Delphi's Project Manager, select the Target Platforms folder:
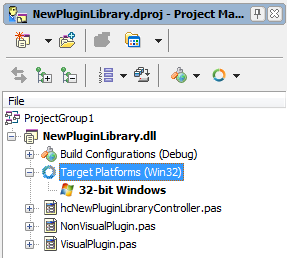
Right-click on this folder and select the Add Platform option, in the appeared dialog select 64-bit Windows:
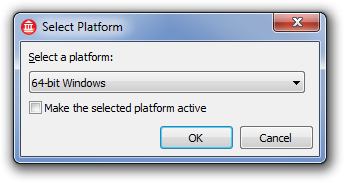
And we are done, you've added support for x64 bit into your Hydra plugin (for Host applications you will need to do exactly the same).
You will probably also want to edit the output path. By default Delphi will put the resulting binaries in .\$(Platform)\$(Config) folder:
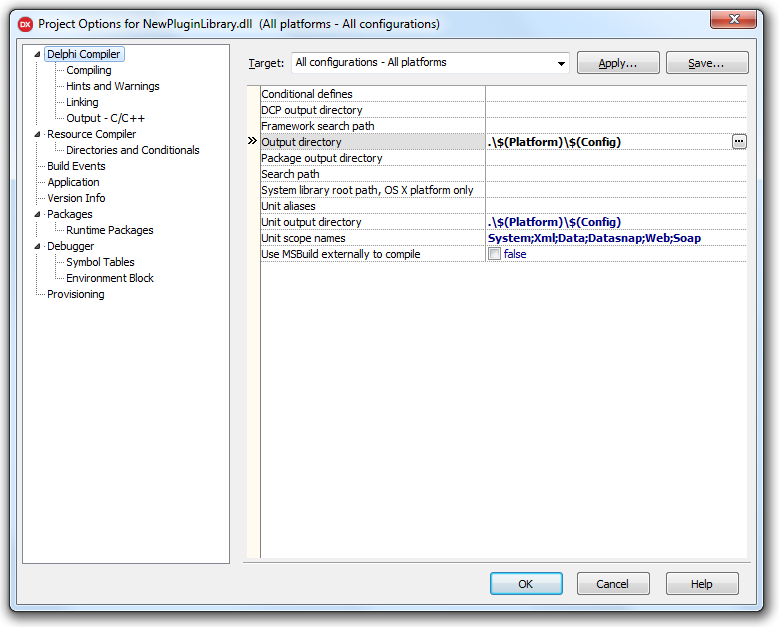
To change the output directory, you need select Project -> Options from the IDE menu; in the options dialog you can set up folders by changing the 'Output Directory'' option.
Now the paths are set, we can build our application, please note that Delphi only builds binaries for the active platform, so the first thing you need to do is set your active platform from the Project Manager toolbar:
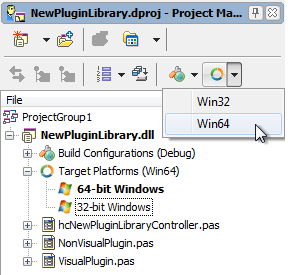
After that you can build your project.
One more important thing to note: when you build your host or plugin with runtime packages support, you need to deploy proper packages, our installer places x64 packages into the [InstallDir]\Hydra for Delphi\Dcu\D16\win64\ and 32-bit packages in the win32 folders.
Note: You need Delphi XE2 or later and Hydra 4 or later to be able to compile your applications in x64.
Hydra for .NET
For .NET projects you can find platform options in the Project -> Options by selecting the Build page:
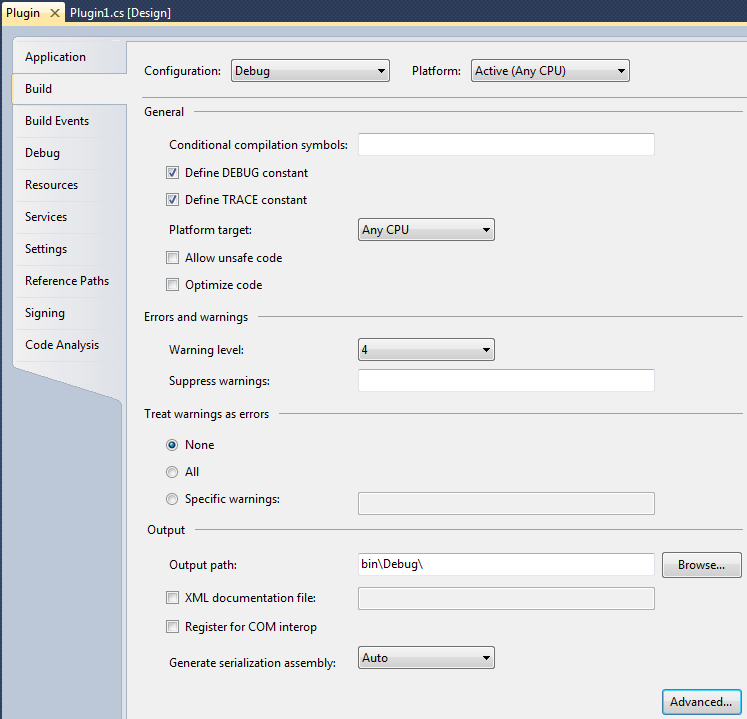
As you can see, by default the Platform Target is set to Any CPU, which means that this application will run natively on the CPU is it currently running on, so it will run as 64-bit on a 64-bit machine and 32-bit on a 32-bit machine.
You need to be careful with this option when mixing managed and unmanaged host/plugins. If you run a .NET host application with Any CPU setting on a 64-bit platform, you will be unable to load 32-bit plugins.
The other two options (x64 and x86) will limit your application to the specified platforms.
As you can see in the screenshot, there is an option called Output path that works in the same way as in Delphi and allows you to set an output directory for your binaries. However, by default you cannot select the platform this option will apply to, so first you need to add your platforms into the project configuration. You can do this by selecting Build -> Configuration Manager from the VS IDE menu:
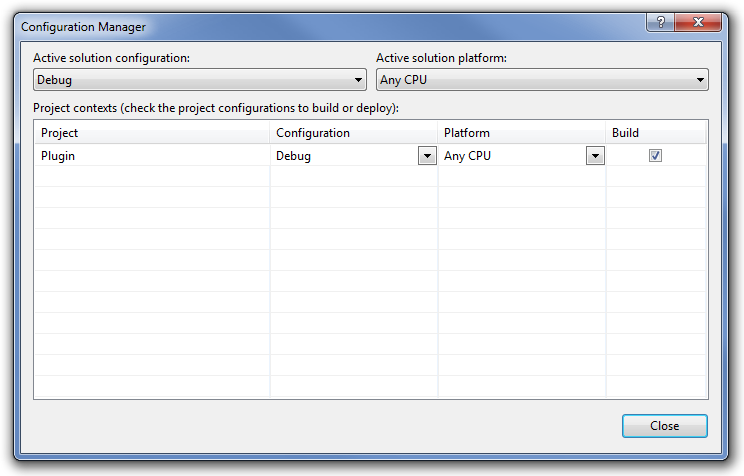
In this dialog you can add platforms for both solution and project, to do this you need to select the platform drop-down box and click on the <New...> option:
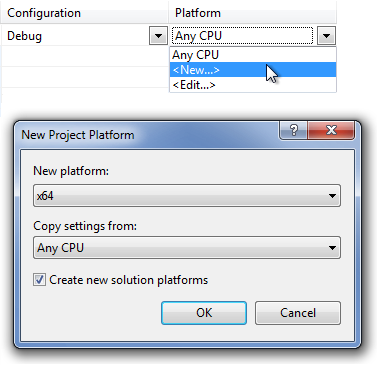
In the appeared dialog you can select the desired platform, and can now change the project settings for the specific platforms.